Frequently Asked Questions
VendorsPortal is a web application for Orient Originals, Inc. vendors.
The whole VendorsPortal exercise is with objective to enter shipment details
and upload other shipment documents. You can also track your open and closed
orders etc.
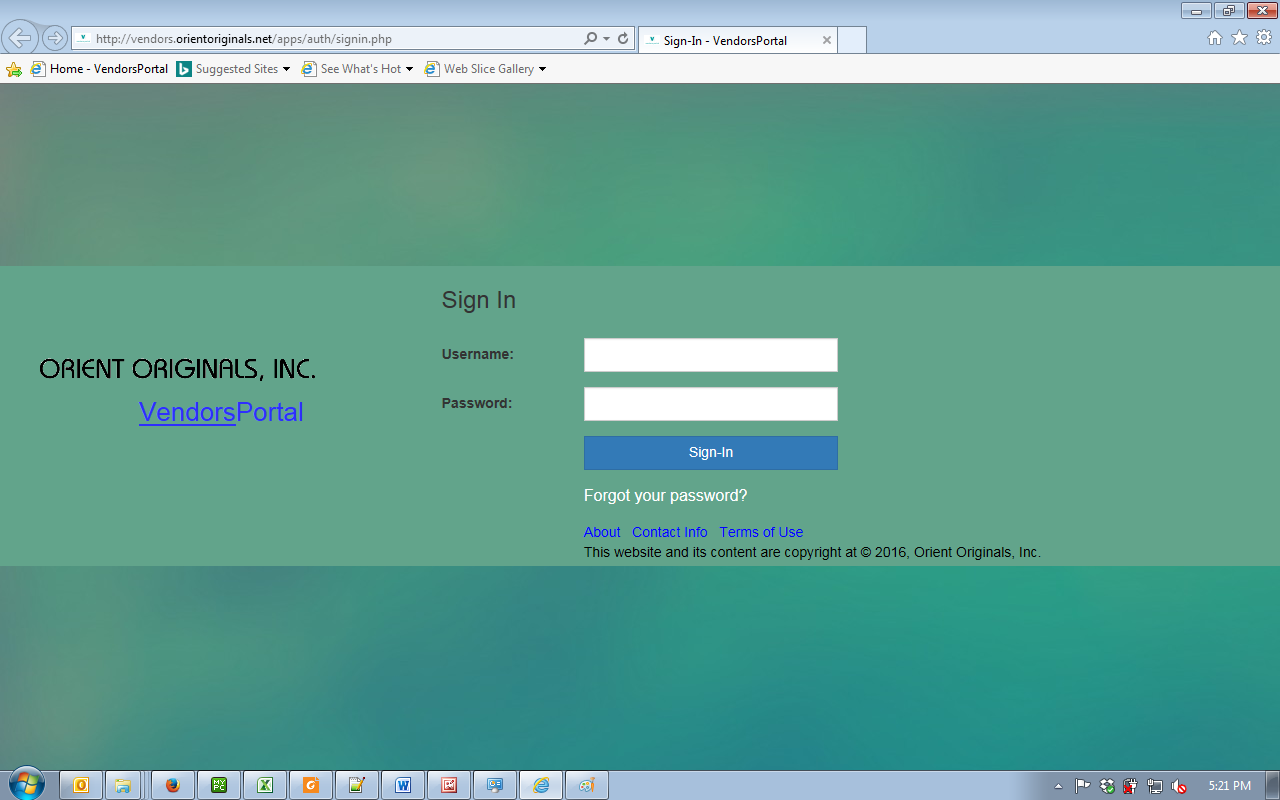
- To access VendorsPortal user should open their web browser (IE, Firefox, Chrome, Opera etc.), once the browser opens, enter the following URL http://vendors.orientoriginals.net/apps/auth/SignIn.php in the browsers address bar as shown in below figure.
- After entering URL hit enter or click on Go euro key, the below Sign In screen will appear. Enter your login details provided by Orient Originals, Inc. and on Sign-In button as shown in below figure.
- Note: Username must in uppercase as it is provided by Orient Originals, Inc.

Only authorized vendors would get login details on their email id along with username and password.
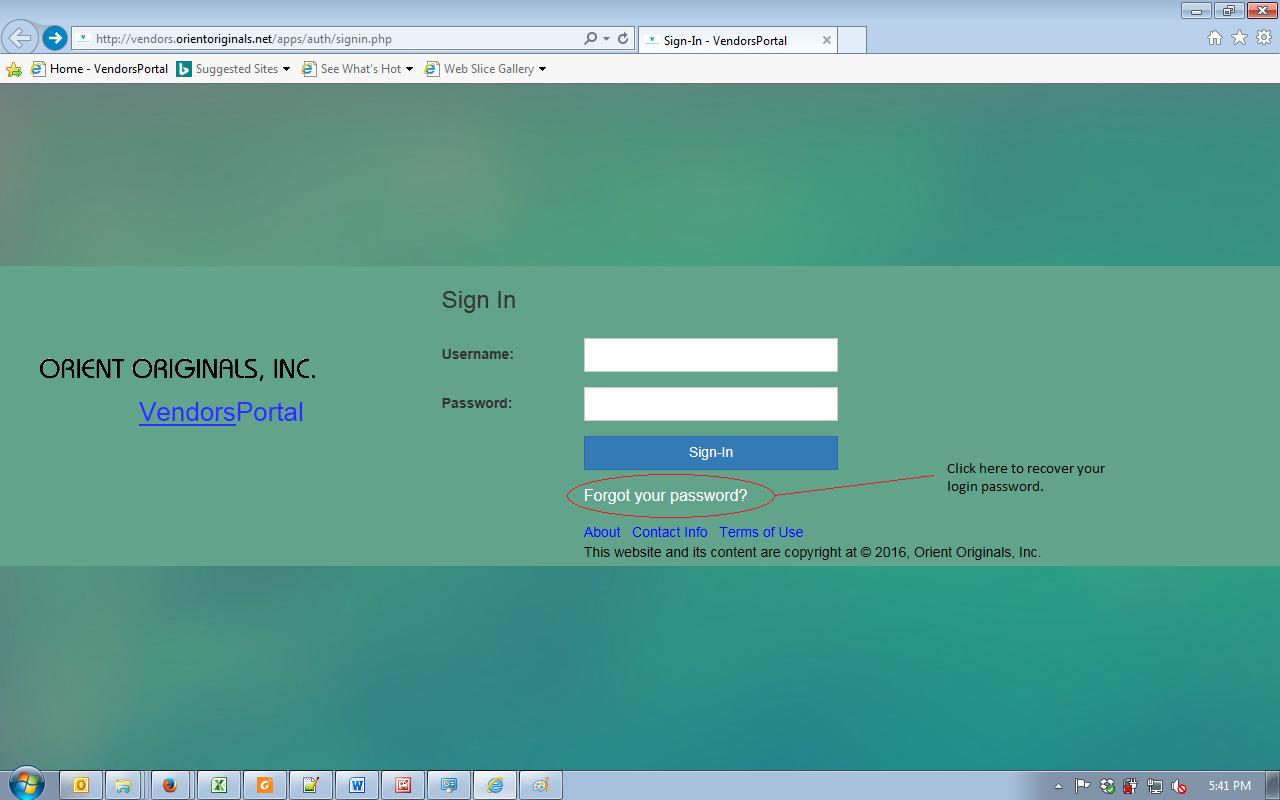
If you forget your password please follow steps below:
- Go to http://vendors.orientoriginals.net/apps/auth/SignIn.php
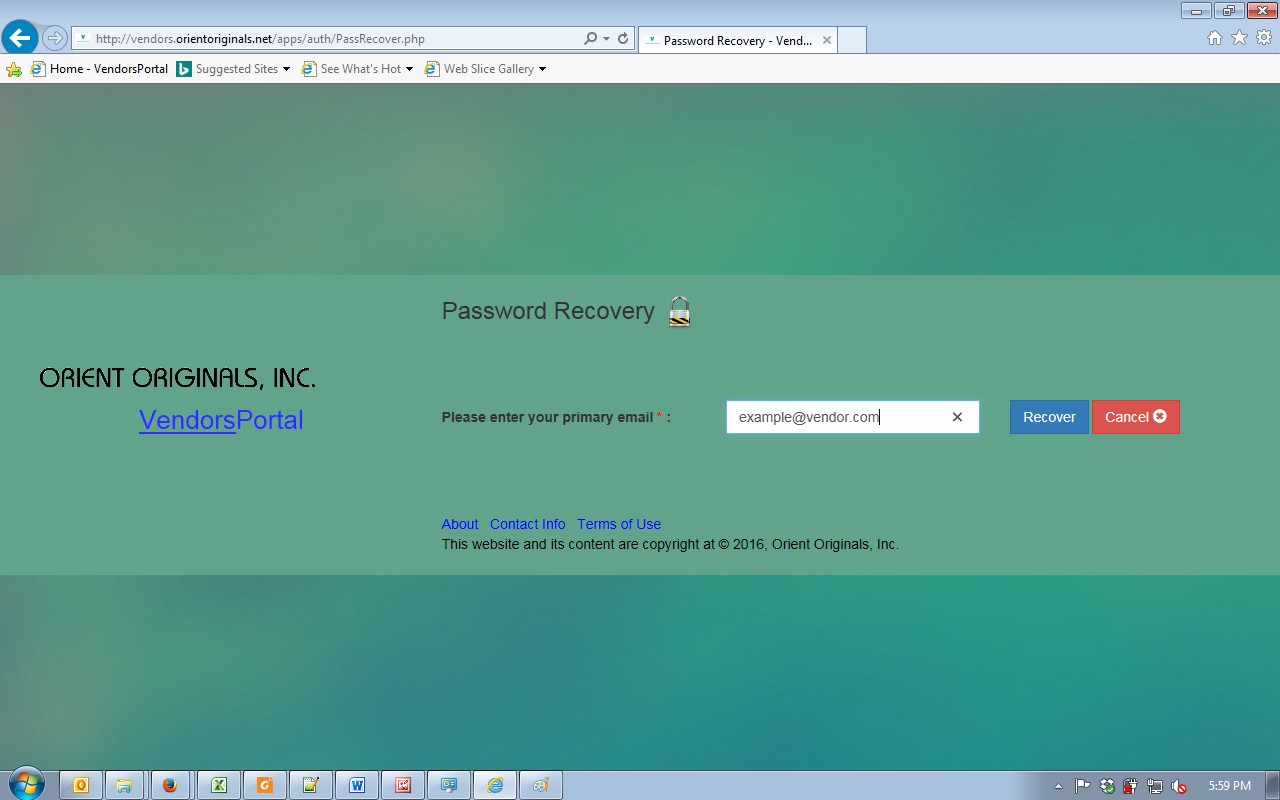
- Click on Forgot your password? on Sign-In page. It will direct you to the Password Recovery page. Enter your primary email address and click on Recover button as shown in below figure 4.2.
- If you are an existing vendor and entered correct email we will send you a new password on your entered email. You can login with this new password but it is highly recommended that you change your password.
Yes, Click on the company name on the top right corner of the page then click on
Change Password as shown in below figure.

Figure 5.1 - Link to change password page
Once password change page is opens, eneter required details and click on Update button as shown in below figure.
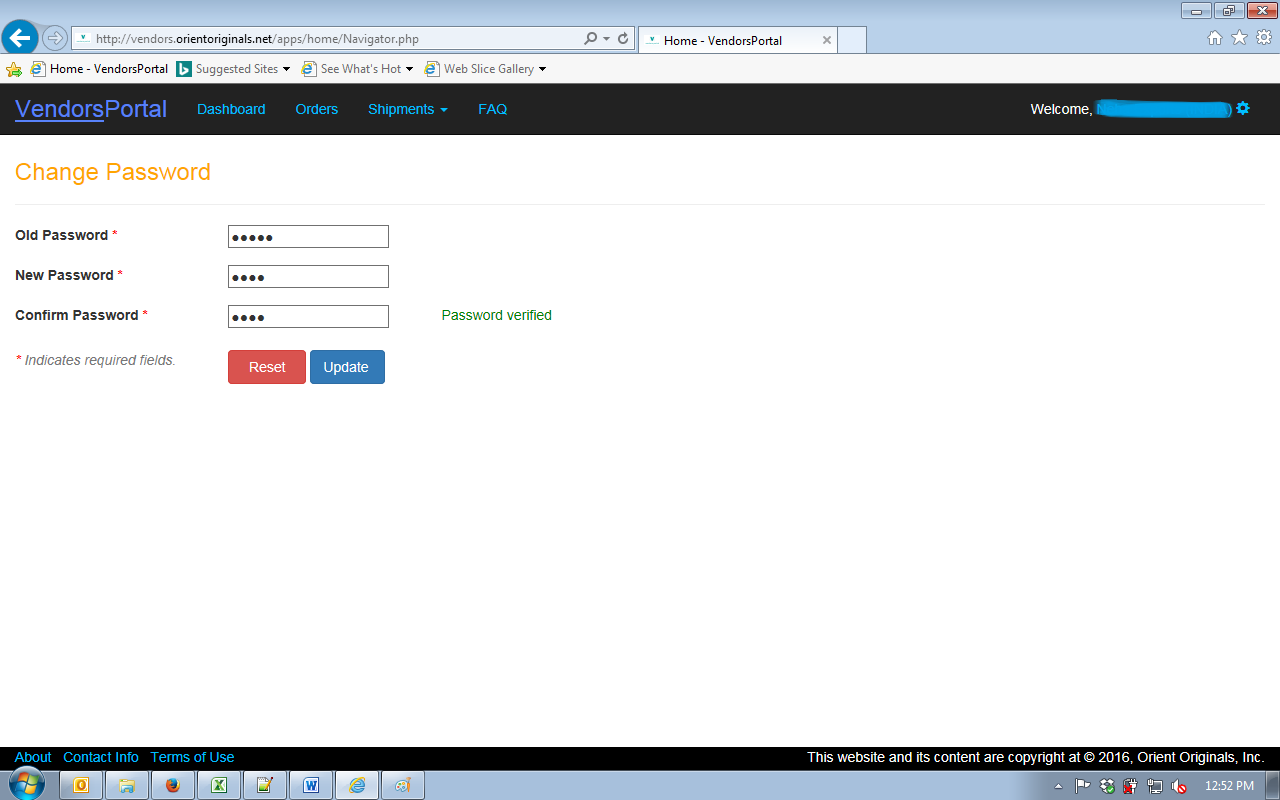
Figure 5.2 - Change Password Page
Once password change page is opens, eneter required details and click on Update button as shown in below figure.
Yes. On your first successful login you will be redirected to update your profile and this is a mandatory step.
Enter all required details and click on Update Profile button. After successful update a pop up window with success message will appear, click ok and press F5 key from your keyboard to refresh/reload.
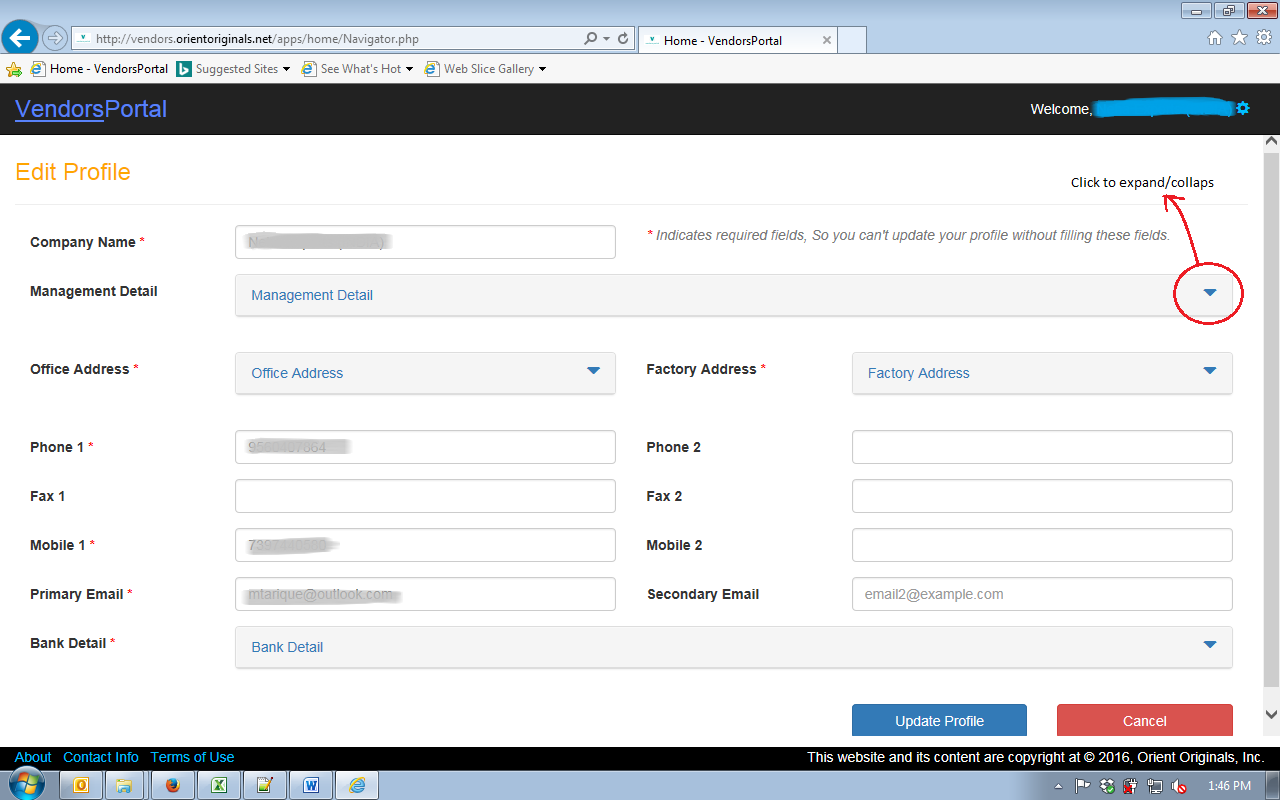
Figure 6.1 - Update profile page on first login
For more information on How to update your profile please refer FAQ Q-08
Enter all required details and click on Update Profile button. After successful update a pop up window with success message will appear, click ok and press F5 key from your keyboard to refresh/reload.
For more information on How to update your profile please refer FAQ Q-08
No. Updating profile is a manadatory step.
For more information on How to update your profile please refer FAQ Q-08
For more information on How to update your profile please refer FAQ Q-08
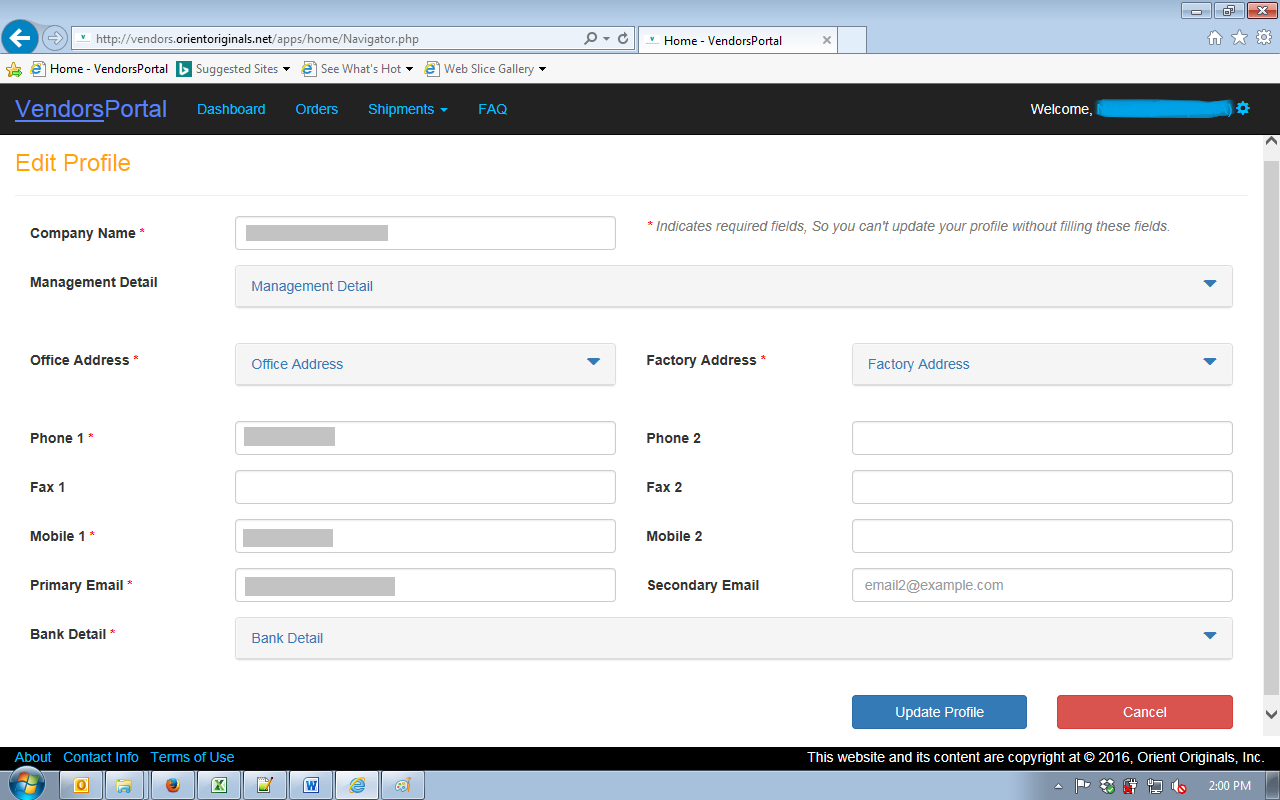
- Click on the company name on top-right corner of the page then click on Edit Profile as shown in below figure.
- Once the Edit Profile page opens, enter all the required details and click on Update Profile button.
- Note: Please do not enter any special charachters in any field. Like ', ", %, !, #, ^, $, ~, ` etc.

To sign out click on the company link on top-right corner of page then click on Sign Out as shown in below figure.

Figure 9.1 - Sign Out
Yes. Please click on Orders tab on navigation menu, further details are self explanatory as per below figure.
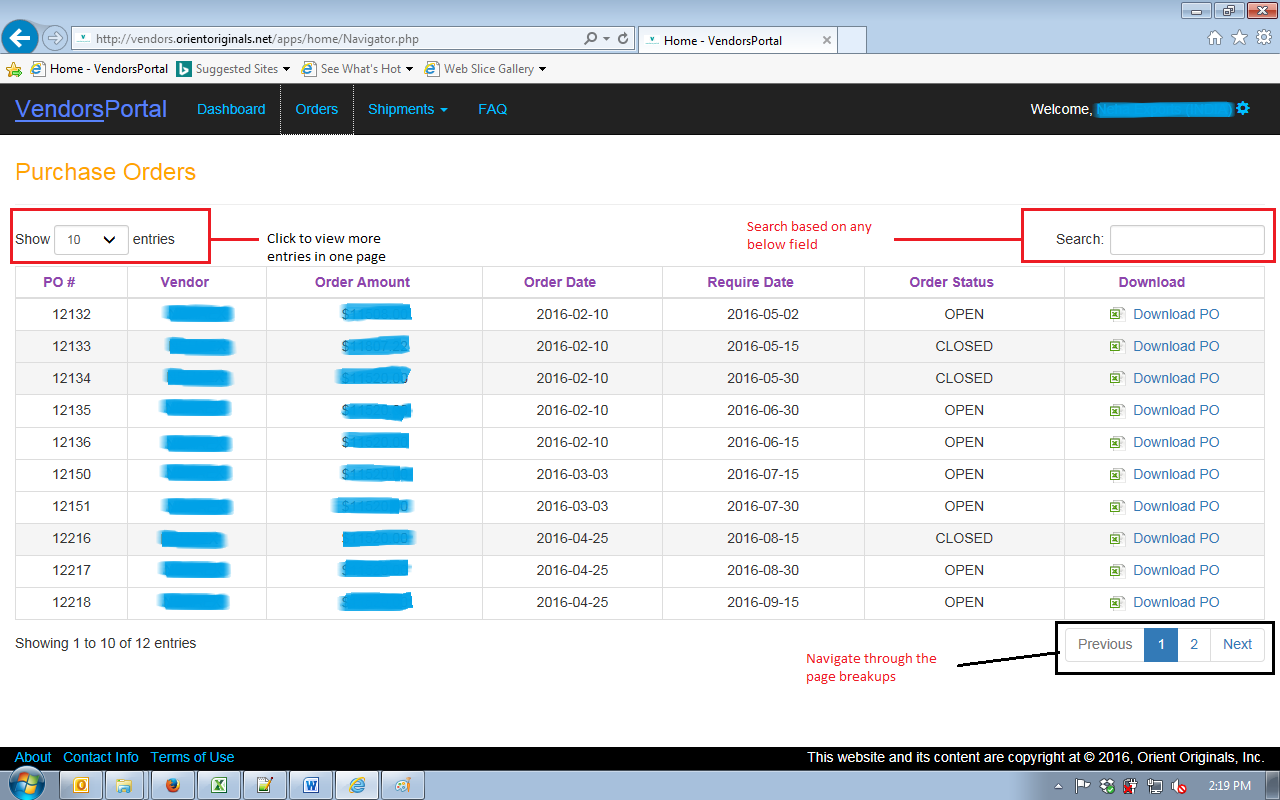
Figure 10.1 - A view of purchase order page
- Please click on Shipments tab on navigation menu, please select Add New Shipment from dropdown menu there.
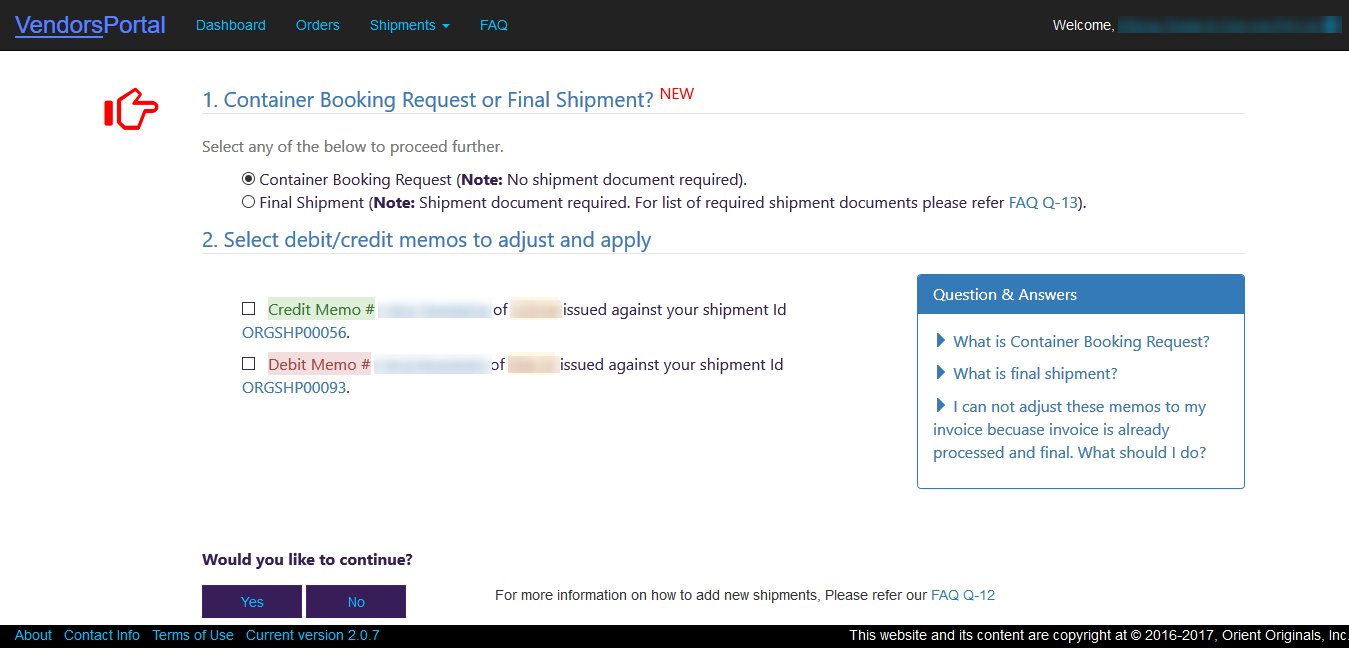
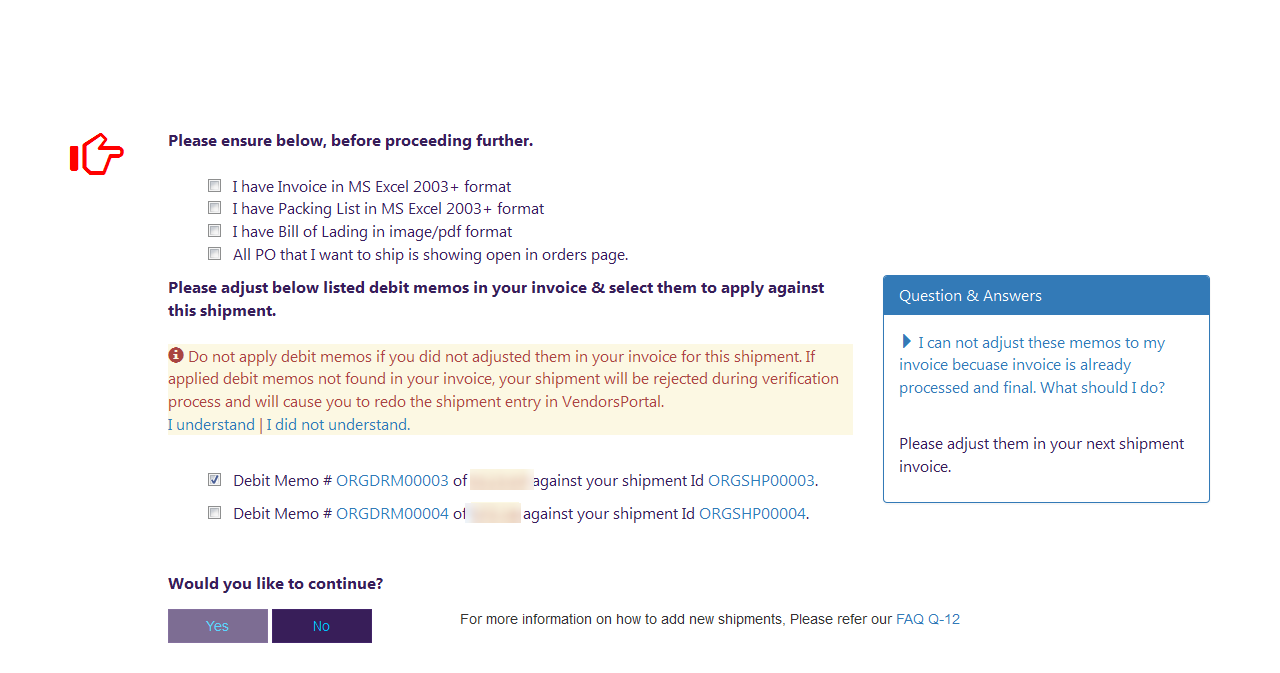
- A confirmation page will be displayed, please ensure the requirement to add new shipment by checking the checkboxes and then click on Yes button to continue as shown in below figure.
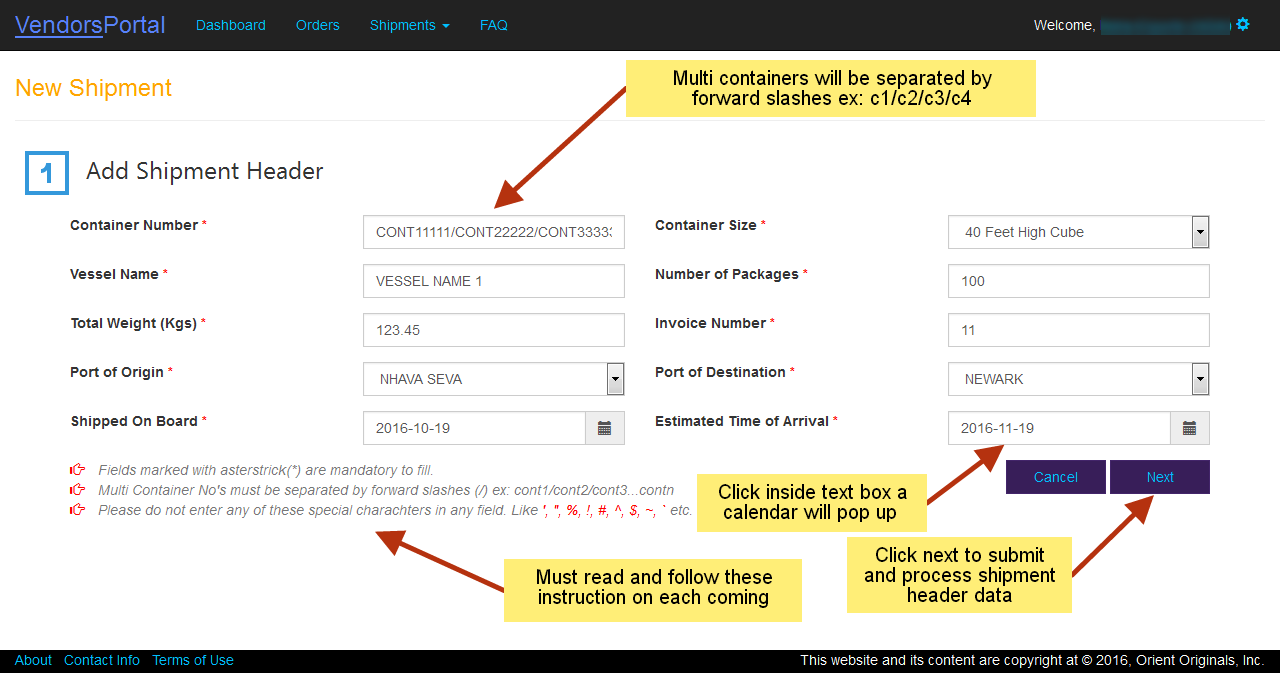
- On Add shipment header page, fill all the required details and follow the onscreen instruction and click on Next button as shown in below figure
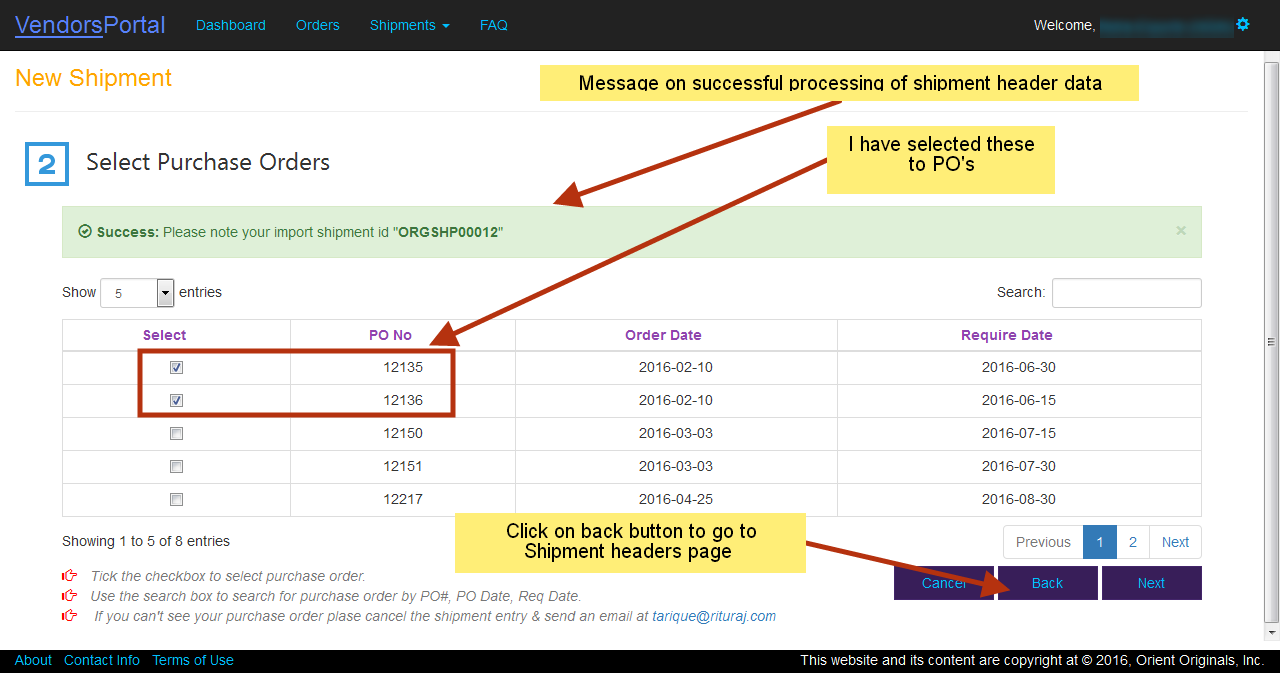
- Select purchase order shipped in this shipment and click on Next button as shown in below figure
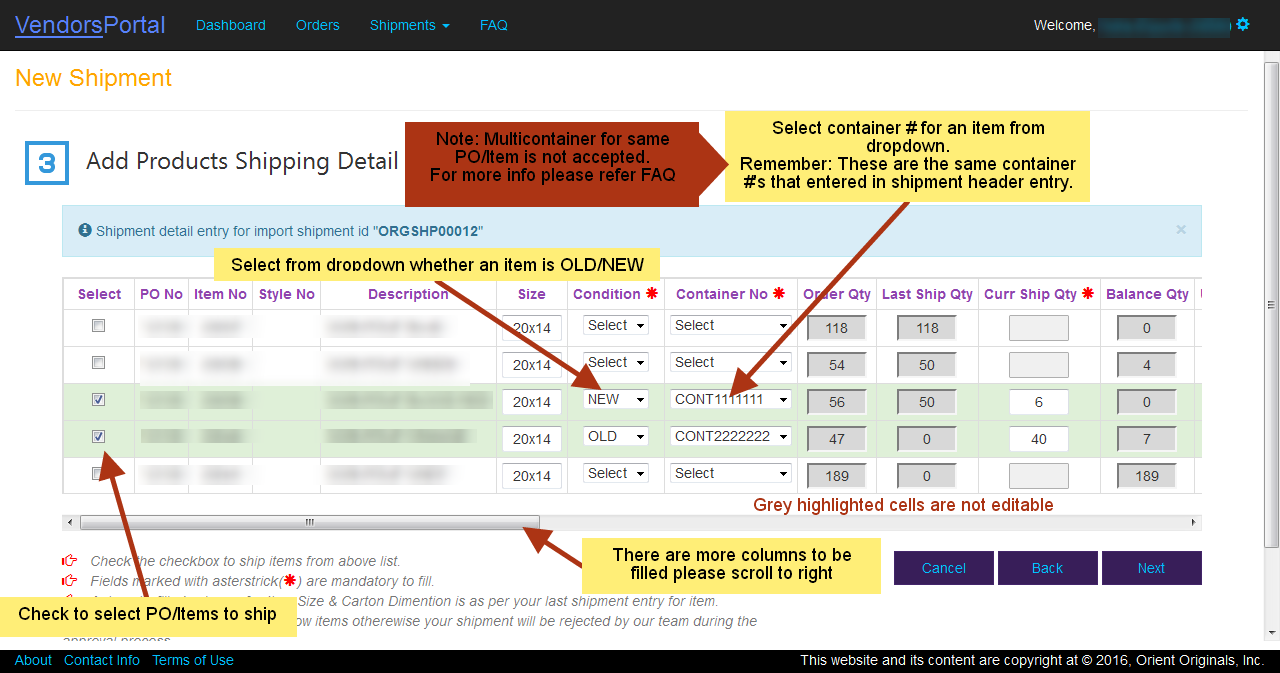
- Please select PO/Item by checking the checkbox and enter the required shipping details then click on Next button as shown in below figure.
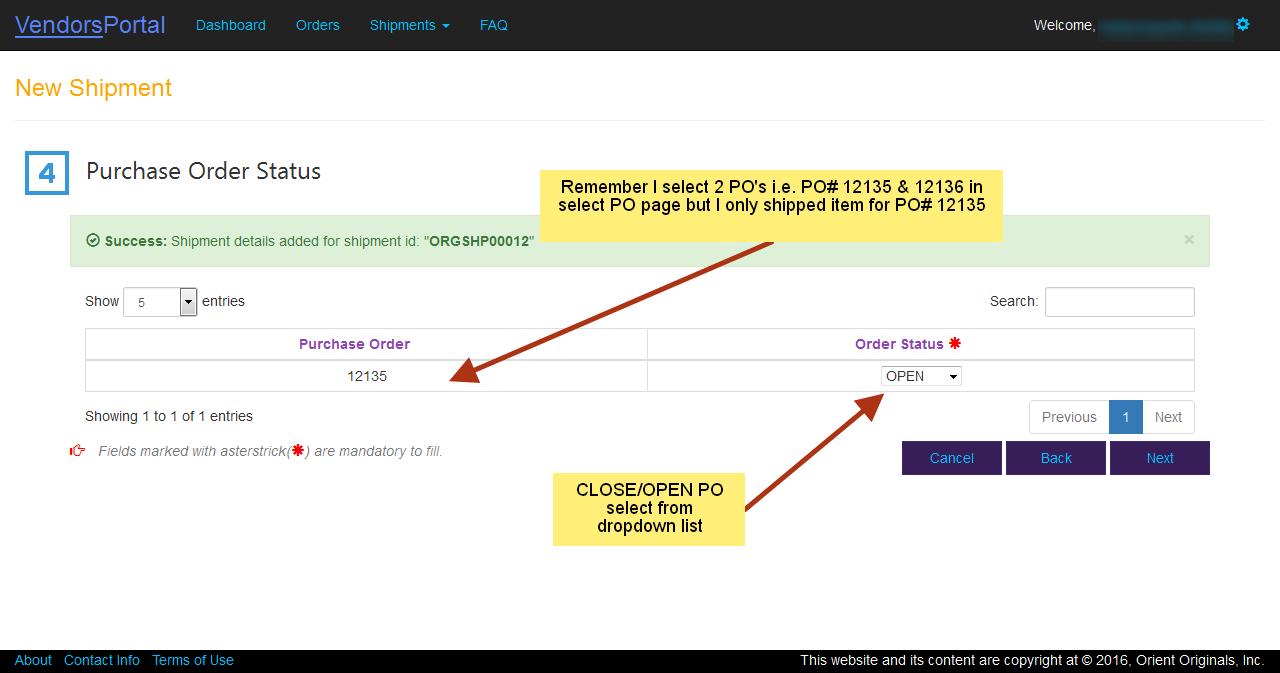
- Change the purchase order status OPEN/CLOSE and click on Next button as shown in below figure.
- Upload required shipment documents that was asked in confirmation page and click on Upload button to upload documents as shown in below figure.
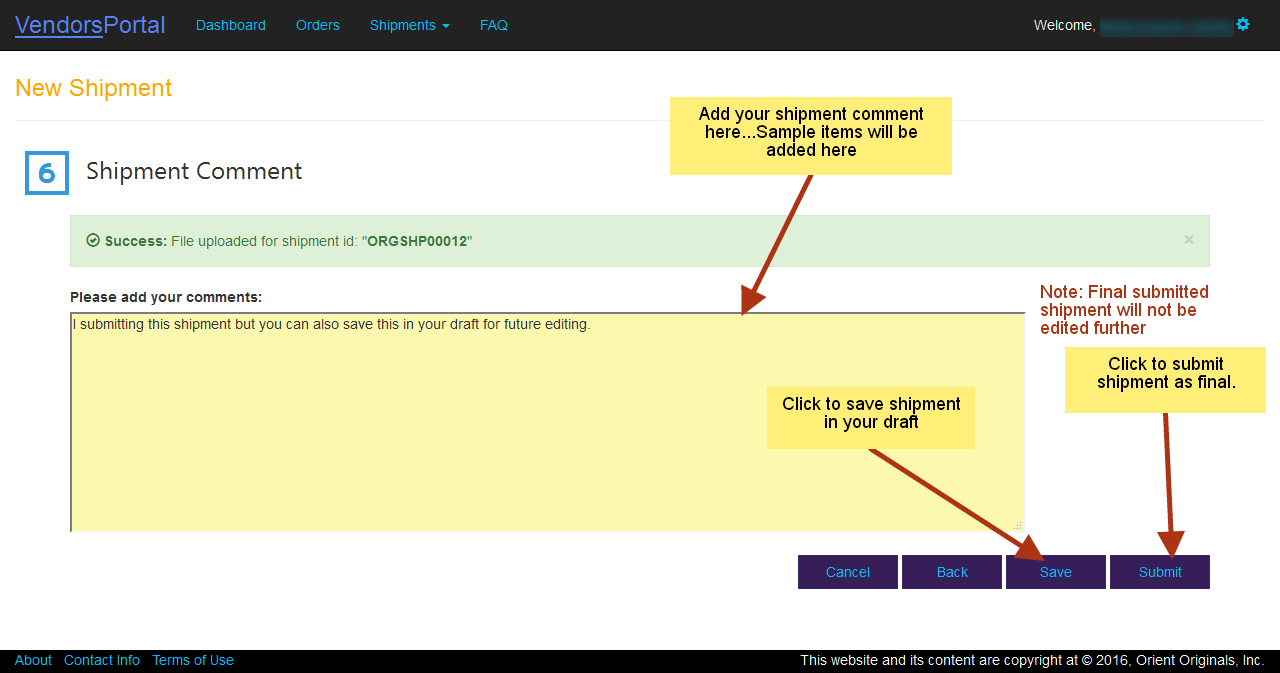
- Add Shipment comment and click on Submit button to submit the shipment as final or you can also save all of your entries in draft for future editing and submit as shown in below figure.
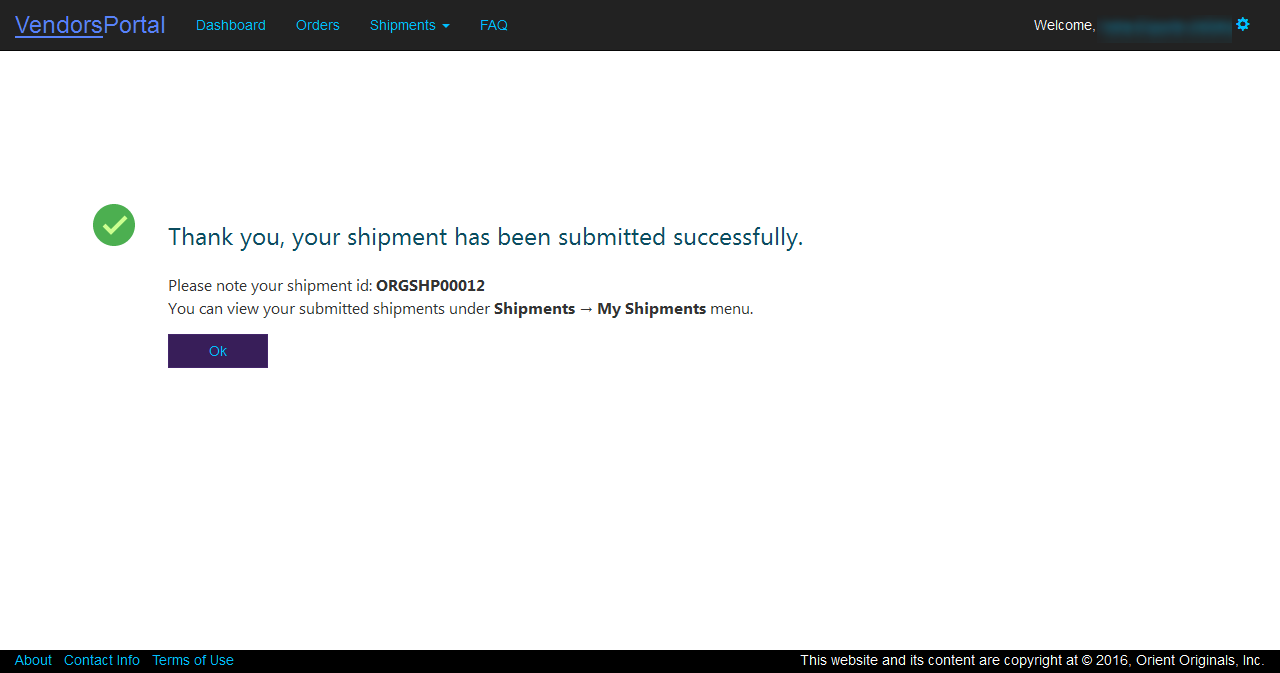
- Message on successful submit of shipment as shown in below figure.

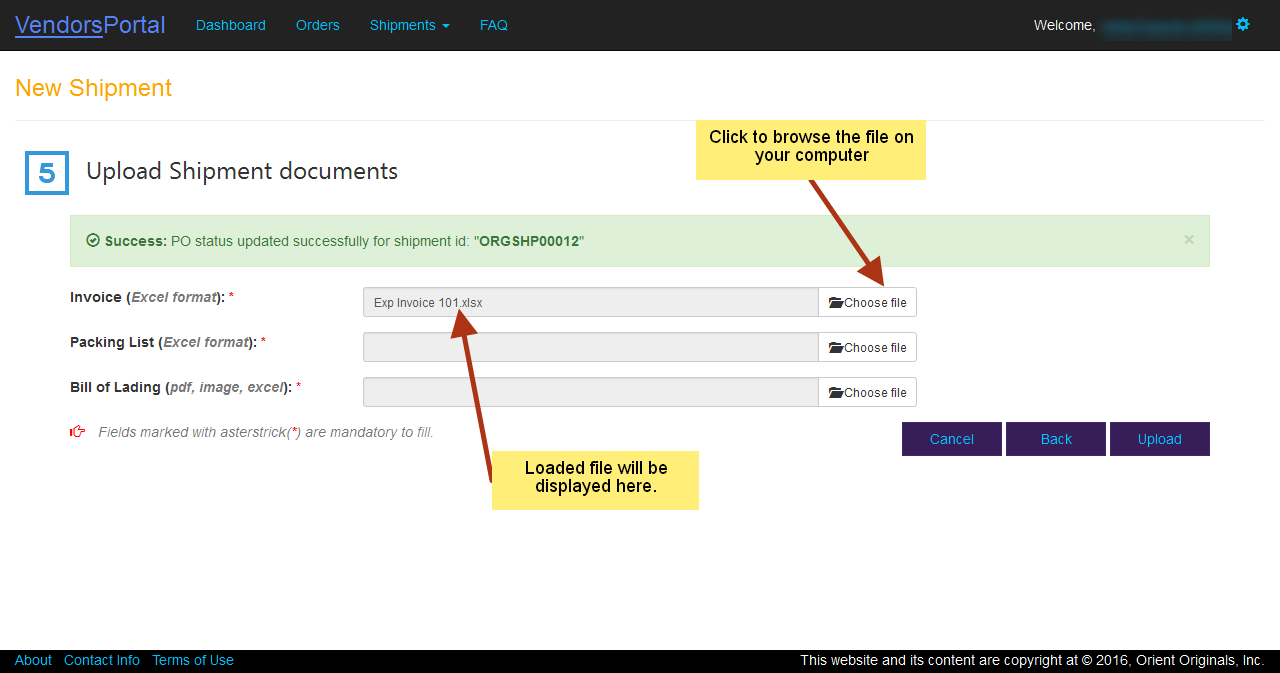
In the coming steps Invoice (Excel), Packing List (Excel) & Bill of lading (pdf/image) required to be uploaded and it is a mandatory process. Without this document you wouldn't be able to submit the shipment. So please keep them ready before proceeding further.
This is unique number automatically generated on save or final submission of new shipment.
No, please follow the below examples-
Example for incorrect way: PO#11111 Item#12345 can not be shipped as 20 Pcs in Cont1 and 30 Pcs in Cont2, currently there is no option in system to accept such scenario.
Example for correct way: PO#11111 Item#12345 you can either ship 50 Pcs in Cont1 or either in Cont2.
Example for incorrect way: PO#11111 Item#12345 can not be shipped as 20 Pcs in Cont1 and 30 Pcs in Cont2, currently there is no option in system to accept such scenario.
Example for correct way: PO#11111 Item#12345 you can either ship 50 Pcs in Cont1 or either in Cont2.
All sample/non PO items/goods to be added in comments step.
Press F5 to refresh your browser's window and go to draft section from navigation menu your shipment is automatically saved in draft with whatever the entry you did so far. You can edit your shipment from there.
To contact technical support.
All your saved shipments can be visible in draft section. Shipments in draft can be edited, deleted &/or
submitted as final.
- Accessing draft section : Click or hover over the Shipments tab on the navigation menu, a dropmenu will appear, then click on Draft as shown in below figure.
- Edit, Remove & Submit your shipment as instructed in below figure.


- Please click/hover on Shipments tab on navigation menu, then please click on My Shipments from dropdown menu there. All of your submitted shipments are availbale to view/download for the future reference.
- To download shipment docs click on Downloads button, then click on the document you want to download from dropdown menu as shwon in below figure.
- Note: Once submitted further editing is not allowed and becomes the data property of Orient Originals.

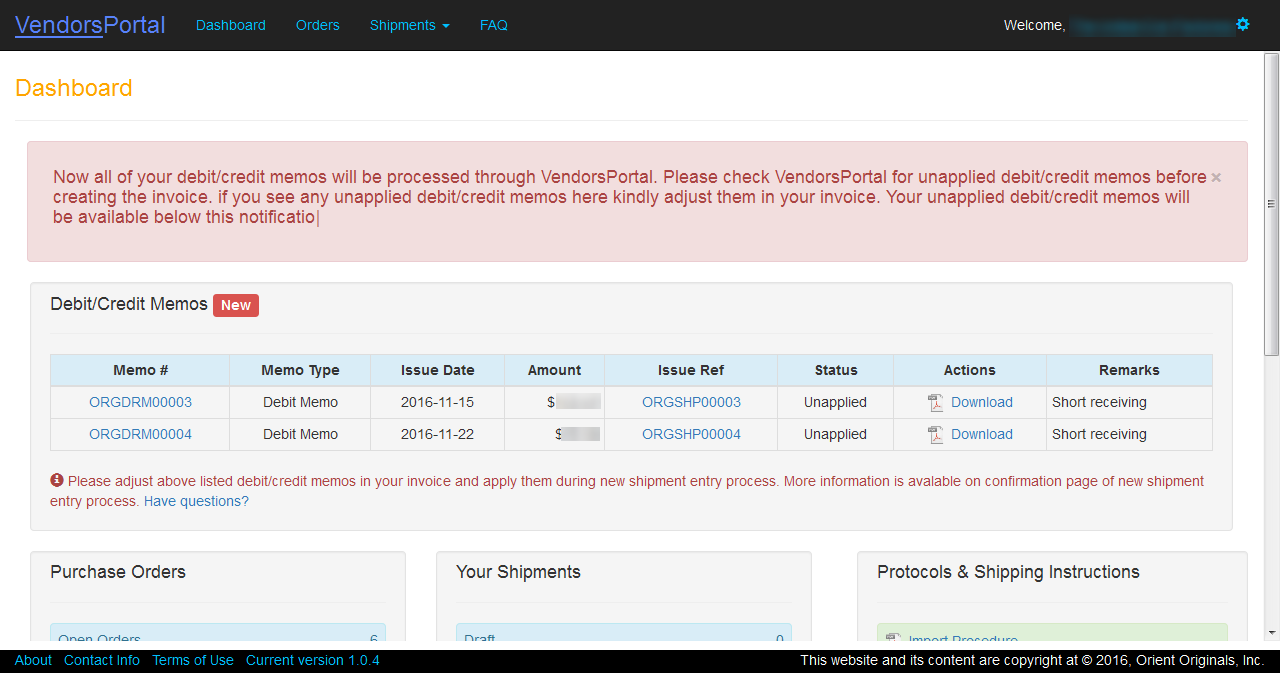
- Now all of your debit/credit memos will be processed through VendorsPortal.
- You can view your new unapplied debit/credit memos in VendorsPortal dashboard and on confirmation page of new shipment entry process.
- Before creating new invoices you must check VendorsPortal for any unapplied debit/credit memos and kindly asjust them in your invoice with debit memo no and select those debit/credit memos to apply during shipment entry process.
In order to process your shipment you need to make request to book the container via VendorsPortal.
No, Container booking via email will no longer be responded and will considered as invalid request.
In order to request container booking you need to enter your shipments detail by following below steps:
- Login to VendorsPortal using your username and password provided by Orient Originals, Inc.
- Go to Shipments → Add New Shipment.
- In Add New Shipment's page select Container Booking Request. Then click on Yes button to proceed further.
- Then you need to go through step by step shipment entry process. Note: Step-6 (Document Upload) is not available when you go through request container booking.
- In Step-6 click on Save & Request Booking button. This action will submit your booking request and will save your shipment in draft.
Go to Shipments → Booking Requests. There you can see all your booking requests with its booking status.
You will get an automatic email with attached Booking Receipt on your registered email ids on VendorsPortal. Alternattively you can follow below steps:
- Go to Shipments → Booking Requests.
- Check Booking status. Once your booking process completed you will see a Download button. Click on this button in order to download the booking receipt or DO.
Once you get your bill of lading go to Shipment→Draft click on Edit link and select Shipment Documents this will take you to the document upload page. There you can upload your Invoice, Packing List & Bill of Lading.
There you will see your all debit/credit memos that you have applied during booking request entry process.
There you will see your all debit/credit memos that you have applied during booking request entry process.
Yes, Once you get Bill of Lading, you need to submit the shipment from draft as final shipment by updating all the required details including shipment documents and it is a mandatory process.
Yes, If there is any discrepancy found in the booking request or in the shipments data Orient Originals have right to cancel and reject the booking request and the shipments data associated with it.
For canceled bookings you will get notified via automatic email and can also be viewed from your VendorsPortal account refer FAQ Q-35.
You need to make a fresh booking request from start.
- Go to Shipments
- Select Booking Request
- Click on Cancelled Bookings Tab
No, It is recommended to download the shipments detail after making request from draft section by clicking on import shipment id.
Name: Muhammad Tarique
Email: tarique@rituraj.com
Email: tarique@rituraj.com
Name: Rajiv Sharma
Email: rajiv@orientoriginals.com
Email: rajiv@orientoriginals.com
Name: Suresh Kumar
Email: suresh@rituraj.com
Email: suresh@rituraj.com